Basic Information is entered on the New Transaction (Order or Cart) page. With starting blocks, for cart/sale transactions, the icon in the upper left corner indicates you’re starting a new cart.
Show Picture

Entering basic information involves selecting the Customer and Order Type. You may also choose to assign a sales associate or disconnect the selected customer.
Customer - This is required. If you know the customer's name, enter it in the Customer field. Or click the Use Enhanced Search link to display additional criteria.
More
A customer must be specified. If you know the customer's name, enter it in the Customer field. Or click the Use Enhanced Search link to display additional criteria. Clicking this link displays three additional fields for searching on:
Customer Name/Account Number – Same as the Customer field.
Service Number – Requires an exact match. The field accepts alpha characters so you can enter X’s to search on temporary service numbers.
Social Security Number – Requires an exact match on the complete nine-digit number or the last four digits.
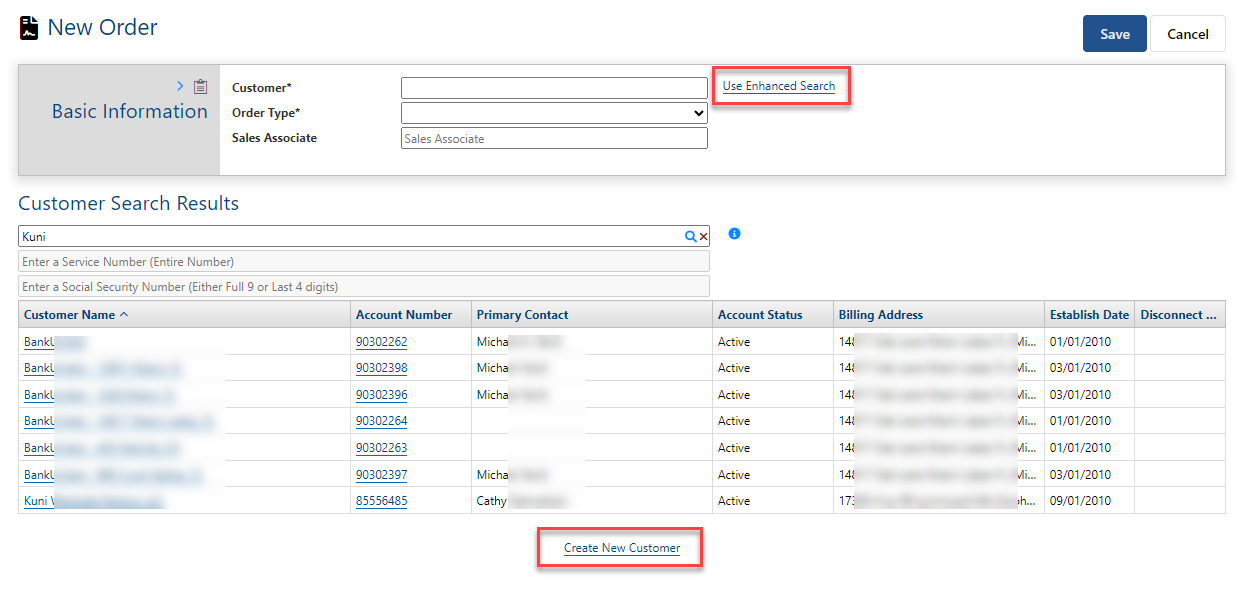
If you enter a value in the Customer field and then click Use Enhanced Search, the search will use that value to find matching accounts.
You can specify Order Type, Sales Associate and Disconnect Customer prior to initiating an enhanced search or defer until after performing the search.
You can use one enhanced search option at a time. When you start to enter a value in one field, the other fields will be disabled. If you enter a value in one field and then decide to use a different option, you can clear the current entry using the associated red x.
After you enter a value for an enhanced search field, click the associated search icon. This displays a list of matches based on the criterion you chose to use. Select a customer from the list and then click Save.
Seamless Navigation to/from Customer Care for Add Customer Transactions
The enhanced search lets you navigate directly to Customer Care from the Enhanced Customer Search to create a new customer and then return to the transaction seamlessly. This functionality is supported with or without starting blocks enabled. The Create New Customer link is presented only after you do an enhanced customer search. This helps prevent creating a new account when you should use an existing account.
Clicking the link opens Customer Care to the New Customer view in a separate browser tab.
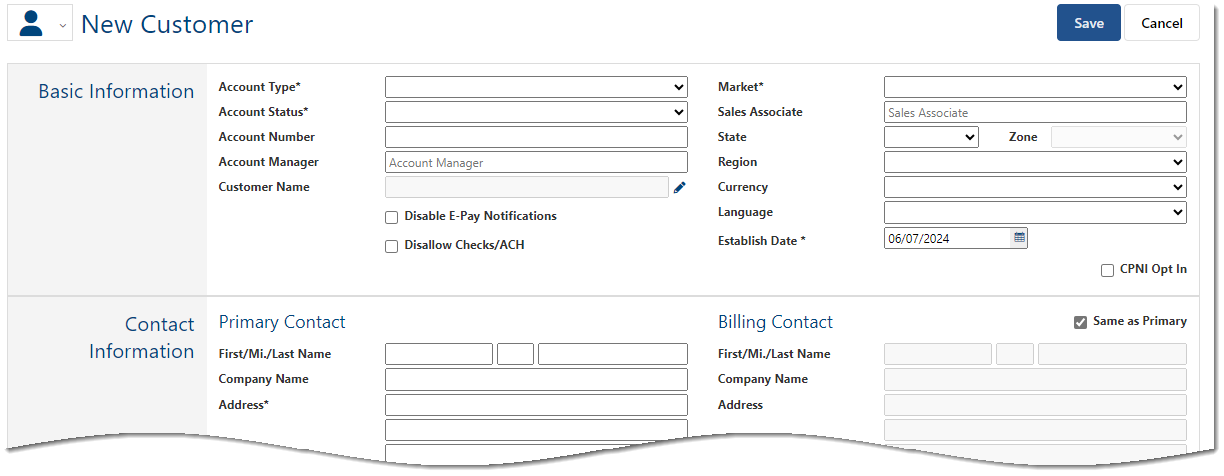
Saving the new customer closes the Customer Care browser tab and returns you to the transaction with the new customer selected in the Customer field.

Note
If you initiate the transaction from Customer Care, the customer name is auto-populated and can be edited as needed.
Order Type - This is required. The Order Type drop down is populated with the Order Types for your system as defined in Admin Console. Order Type may be auto-populated if you start the transaction from a starting block and Order Type is specified on the block.
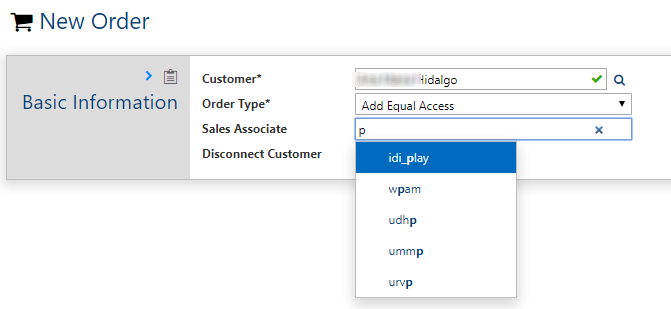
Sales Associate is optional. If the Auto-populate Sales Associate on Orders setting is enabled and the user (or customer) has a sales channel assigned, you’ll see the value auto-populated in this field. If neither has an assigned sales channel, or if you want to change the auto-populated value you can use this field to enter a value directly. This is a type-ahead field that auto-filters available choices based on the text you enter. Simply begin entering a value and the field will display a list of choices matching the entered text.
Show Picture
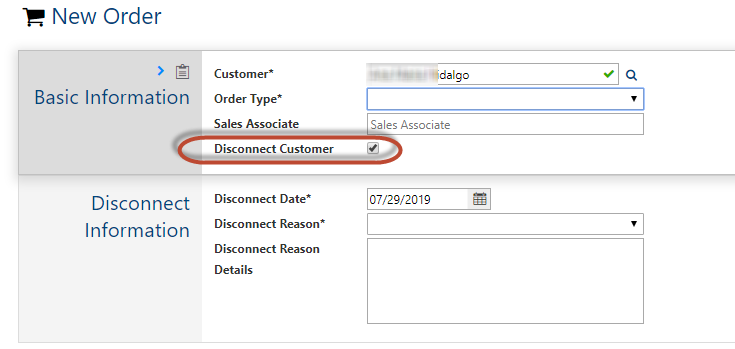
Disconnect Customer - You can use the Disconnect Customer check box as needed to initiate a Disconnect Order.
Show Picture
Note
Additional fields are presented on the New Transaction form for refresh service orders, returns, voids, and bill payments as described in the respective topics.
When you're done entering basic Information, click Save. At this point you can continue with assembly and other phases below to finish the transaction, or leave and continue later using the Omni Search.
Notes:
You may be required to perform a credit check to proceed. See Credit Scoring.
You may be required to select a register before proceeding to assembly when applicable. See Assigning a Register for Retail Transactions.
If neither credit checks nor registers apply, proceed with assembly.


