The IDI platform integrates with the TransUnion credit bureau to let you perform credit evaluations on new, prospective, and existing customers. The results returned from TransUnion can be used to assign the customer a carrier-configured credit class to set credit limits, deposit requirements, and other credit-related rules.
In addition, you may require your customers to pay a deposit when they open an account or make a substantial purchase, based on their credit history. Deposits are held in a designated bank account for a specified time, and then returned to the customer if they pay their bills reliably. Depending on prevailing state law, deposits may accrue interest which is posted to the deposit balance by a scheduled job that runs nightly.
This functionality requires setup in IDI Desktop Client, Admin Console. and the Orders and Product Catalog web modules. For details, refer to the Credit Scoring Setup article in the IDI Knowledge Center.
For a comprehensive description of credit scoring with the IDI platform , refer to the Credit Scoring and Deposits article in the IDI Knowledge Center.
The basic flow and mechanics are described below.
Basic Flow
If the transaction is adding a new customer, you can use the Use Enhanced Search function’s Create New Customer link to Customer Care to create the customer on-the-fly and then seamlessly return to the Orders web module to complete the transaction.
The Credit Check Required logic is called on saving the information on the New Transaction view. This determines if the transaction requires users to submit a request to TransUnion to evaluate the customer’s credit score. A message pop-up indicates whether this step is required, and displays any of the following types of messages configured by IDI per customer requirements:
Error - These prevent the transaction from proceediing. Example: Customer cannot proceed because of their poor credit history.
Confirmation - These do not prevent a transaction from proceeding. Example: Customer has passed the credit check and can proceed.
Informational - These do not prevent a transaction from proceeding. Example: Customer's deposit will drop off after 3 months of on-time bill payments.
Messages are grouped together by type, displaying in the order presented above, with the first type displayed, and the other type(s) collapsed until clicked on to reveal full messages.
From here you can continue as long as there are no errors.
Note
If one or more errors are displayed, the only option is to close the pop-up and return to the New Transaction view without doing the credit check.
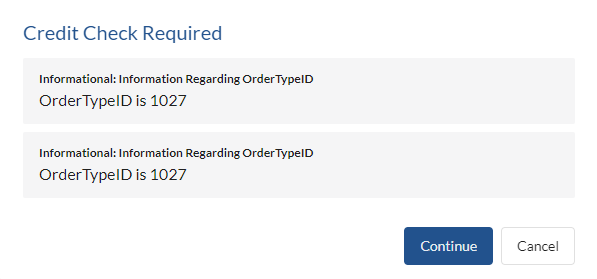
How you proceed on continuing depends on whether the logic determines a credit check is required.
The Credit Check form is displayed if the logic determines users need to submit a new request. Most fields are auto-populated based on the selected customer. If any required fields are undefined, they will be shown in red and you will not be allowed to proceed until they are defined.
Note
This form is skipped if the Credit Check Required logic determines a new credit check is not required.
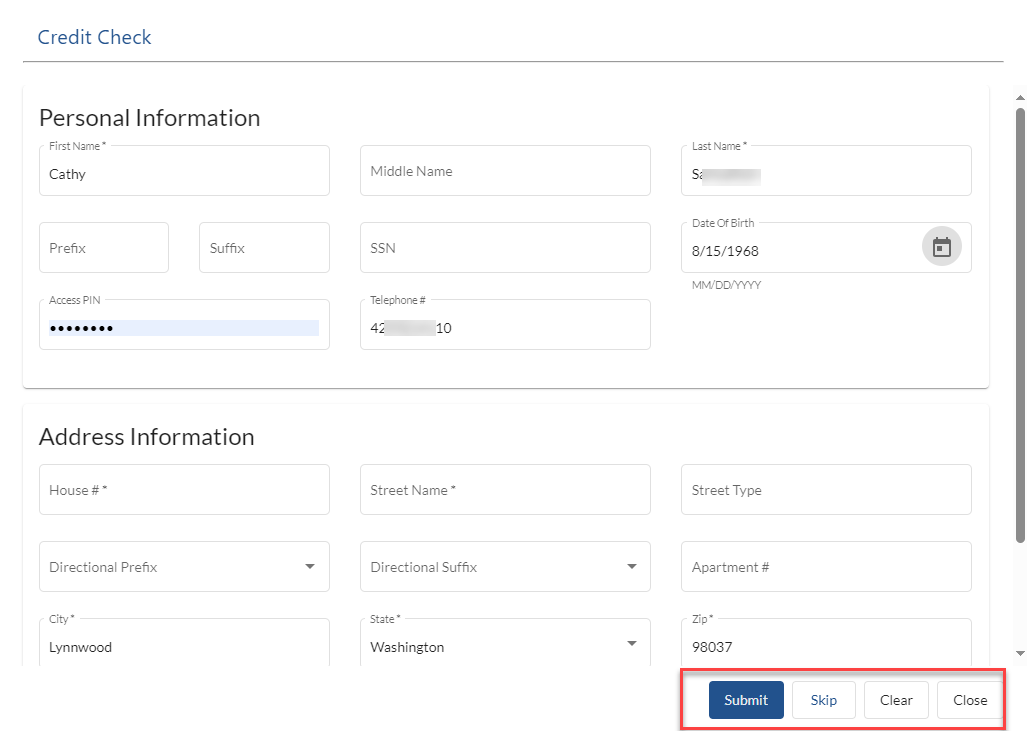
Users with Skip Required Credit Check permission will have the option to dismiss this form without completing it. Users without this permission will be forced to enter and submit the required information to complete the credit check.
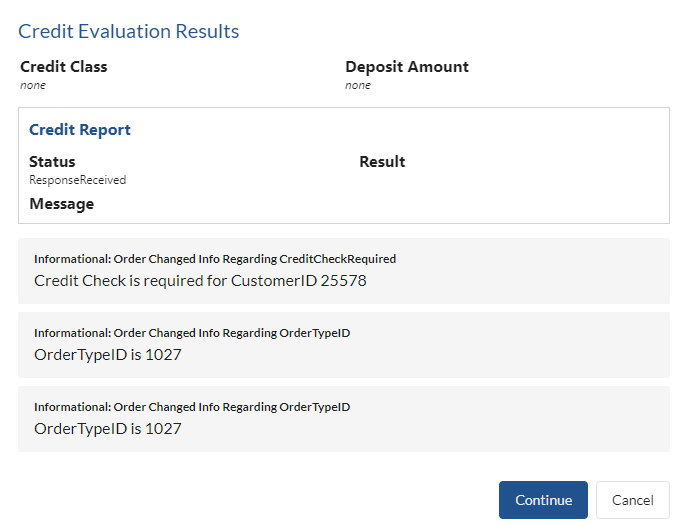
Clicking Submit sends the personal and address information to TransUnion. The Credit Report Response logic is called when a response is received from TransUnion. It will display the Credit Evaluation Results, including information from TransUnion’s response and any messages as may be generated by the logic.
Note
If you choose to Skip the credit report, or if a new evaluation is not required as determined by Credit Check Required logic in the previous step, the evaluation result will simply show the existing credit class and deposit requirements on the account and any messages as applicable.
Below show the evaluation results when a new credit evaluation has been performed.
On continuing, you enter the assembly phase where you add/remove/modify items on the transaction. If the Credit Report Response logic determines a deposit is required, you’ll see a line item for the deposit.
Note
This determination may occur in a later phase of the transaction, depending on your custom logic.
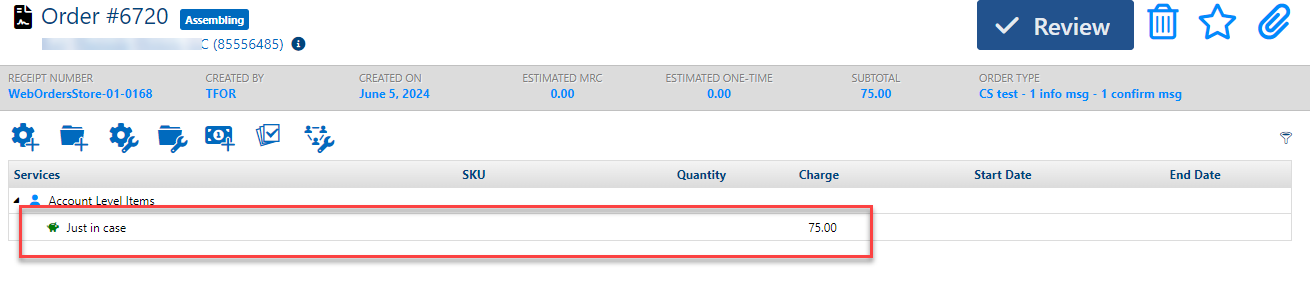
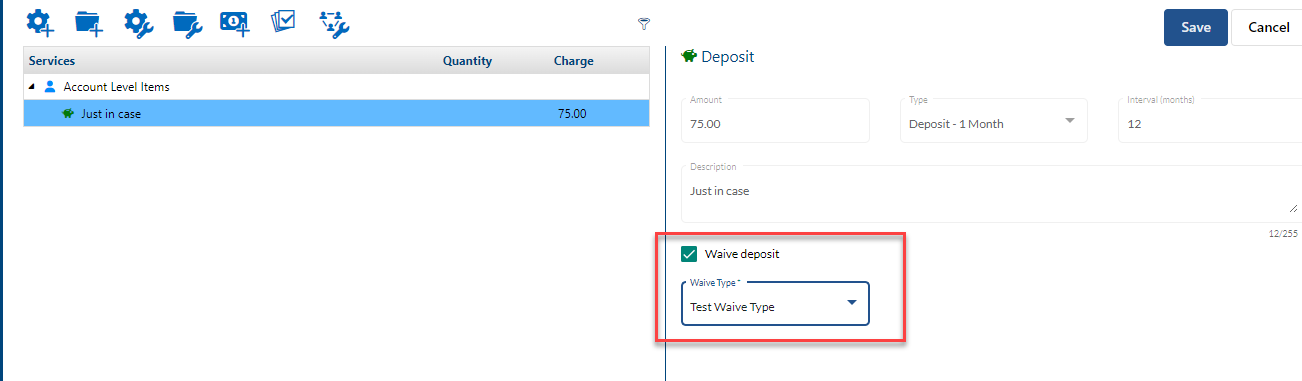
Regardless of when the deposit is added, clicking on the deposit line item displays the details in the right-hand pane.
Note
For deposits automatically added based on the credit report response, all fields are read-only except the Waive deposit option. This check box lets you waive the deposit as shown below. If you choose to waive the deposit, the charge is reduced to $0.00. It remains available as a line item so you can select it again to re-instate it if needed. Auto-added deposits cannot be deleted.
As you add/remove/modify other line items on the transaction, the Credit Scoring Order Changed logic may run to adjust credit score, credit limit, or deposit amount as appropriate. If adjustments are made, the Credit Evaluation Results will display again.
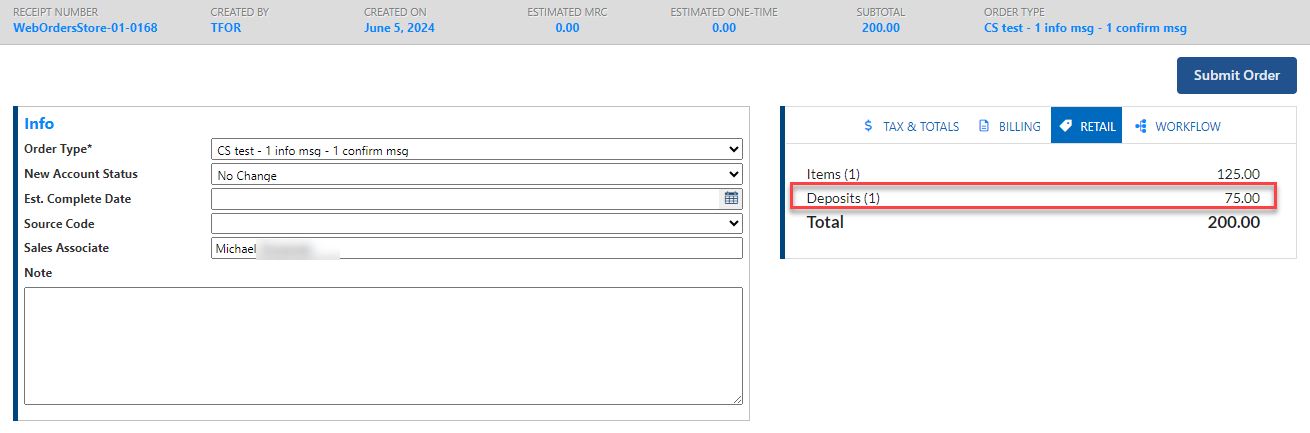
At the point in the transaction, where you can view billing and retail (if applicable) information, the required deposit amount will be shown as applicable.
The Credit Scoring Complete Sale logic runs at checkout. Typically, this logic displays informational or error messages as appropriate. These can be for things like having too many services or information on how many installment plans the customer is allowed to have.


Adding a Deposit Ad-Hoc in a Web Transaction
Adding deposits ad-hoc is supported with or without starting blocks. The Deposit permission under Orders must be enabled. If you are using starting blocks, the selected starting block must be configured with Deposit as an Allowable Action.
When these conditions are met, the Actions bar on the transaction will provide an Add Deposit icon (blue piggy bank). Clicking the icon displays the Add Deposit dialog.

Amount | This field is required. Enter the amount to be deposited. |
Type | This field is required. The selector is populated with values as configured in the Deposits Data Management table in Admin Console. |
Interval | This field is required. Enter the number of months the deposit must be held before it is allocated. The value must be an integer greater than 1. |
Description | This field is optional. |
Once a deposit is added manually, you can click the line item in the left panel to display the details in the right panel. You can edit all details as required.
