State groups organize states into groups (for example, geographic regions). State Groups are used with Local Lookup for preorders. To set up and maintain the State Groups table:
Under Data Management expand the States folder and double-click State Groups. This displays the State Groups window.
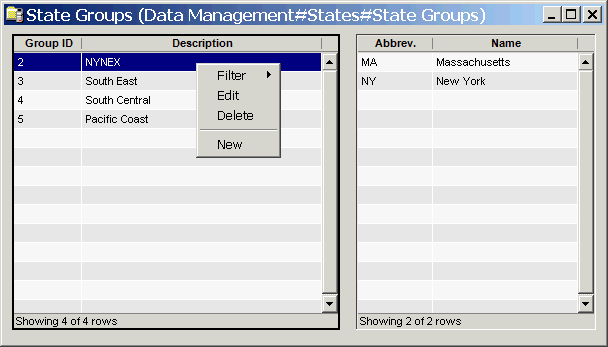
The State Groups window contains the following information.
Group ID
(read only)System-generated identifier that uniquely identifies this record.
Description
Name for the state group.
Group Details - Displayed for the selected group
Abbrev.
Two-character state abbreviation. These are defined and configurable in the States Reference table.
Name
Full name for selected state abbreviation.
To configure state groups, first define the group names in the left pane (group list), and then specify the states that belong to that group in the right pane (group details).
The shortcut menu for the left pane lets you add, edit and delete state groups. See Working with Data Management Tables.
To manage state group details, refer to the section below.
Adding/Editing State Group Details
To add state group details, select a state from the left side of the State Group window and then right-click on the right side of the window and select New.
To modify existing state group details, right-click on the right side of the window, on the state group details and select Edit.
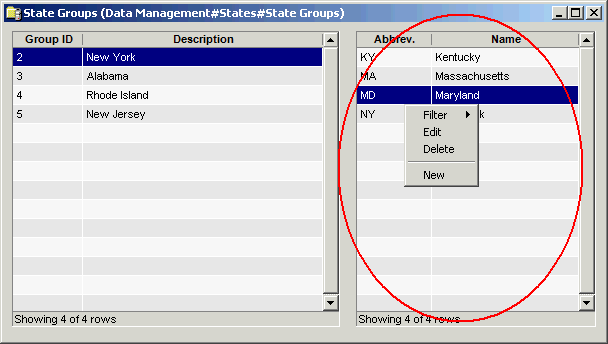
This displays the Add/Edit State Group Detail window.
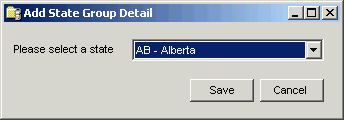
Select the appropriate state from the drop-down list and click Save. The state you selected will be displayed in the right side of the window for the state group you originally selected.