This article covers prerequisites and setup required to manage credit evaluations and deposits in web applications (Orders and Customer Care) and IDI Desktop Client. Much of the setup is common to both platforms, and some setup is specific to the platform where you’re using the functionality. Where the setup applies is indicated below as applicable. Setup for credit evaluations and deposits is covered separately as you may use one and not the other.
Getting Started/Prerequisites
Establish a relationship with TransUnion and work with them to set up an account for your company. Contact your IDI Project Manager for advice on how to do this. Then submit a work order to have IDI set up credit evaluation logic as described above. Include your specific requirements for an IDI specialist to assess.
Credit Evaluations
- Assign permissions.
- Admin Console Security has permissions common to both platforms and permissions specific to IDI Desktop Client.
- Web SaaS Security has permissions specific for the web modules.
- Configure credit scoring settings. This is done in IDI Desktop Client; however, it applies for both platforms.
- Configure credit classes in Admin Console > Data Management. This applies for both platforms.
- Enable starting blocks in the Orders web module and configure one or more starting blocks in the Product Catalog web module. This applies when doing credit evaluations in the Orders web module.
Deposits
- Assign permissions
- Admin Console Security has permissions specific to IDI Desktop Client.
- Web SaaS Security has permissions specific to the web modules.
- Configure tables related to deposits in Admin Console > Data Management. This applies for both platforms and includes:
- Allocation Types
- Deposit Types
- Waive Types
- Interest Rates
Credit Evaluations Setup
Permissions – Admin Console Security
Permissions for credit evaluation functionality in IDI Desktop Client are available via Admin Console > Security > Profiles > Permission Profiles > Applications > CostGuard Client > Credit Scoring.

- Credit Scoring – enable to access credit scoring functionality in IDI Desktop Client including Credit Scoring and Deposits setup, and the Credit Reports tab on the Customer window.
- Credit Scoring > New – enable for on-demand credit evaluations in IDI Desktop Client.
- Credit Scoring > Setup > Configuration – enable for access to credit scoring settings. Note: These settings apply in both platforms, so this permission is required to perform credit scoring in web transactions.
- Credit Scoring > View Detail – enable to access credit report details in IDI Desktop Client.
- Credit Scoring > View Sensitive Credit Information – enable to see sensitive information in IDI Desktop Client, for example full social security number.
There are also permissions related to credit checks in POS Make Sale under Applications > CostGuard Client > POS > Front Office > Sales and Returns.

- Skip Credit Check – determines whether you can skip the step for submitting a request to TransUnion when the Credit Check Required logic determines this is required.
- Waive Deposit – Determines whether you can waive a deposit added by credit scoring logic in the course of a transaction.
Permissions – Web Security
For Orders, in addition to Allow Log On, the following permissions may apply:
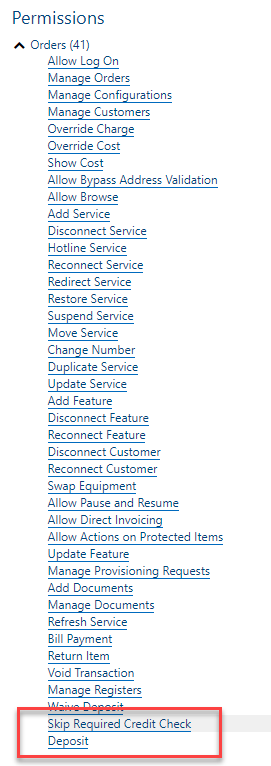
- Skip Required Credit Check determines whether you can skip the step for submitting a request to TransUnion when the Credit Check Required logic determines this is required.
- Deposit determines whether you can manually add a deposit to a transaction, independent of the credit evaluation process. This permission does not prevent automatically adding deposits through a credit evaluation as determined by the credit evaluation logic.
These permissions are provided with the Orders Admin role and may be added to other roles as needed.
For Customer Care, there is one permission related to viewing past credit reports (in addition to Allow Log On):
- View Confidential Information permission is required see the SSN and date of birth fields on the report (they are otherwise masked). This permission is also required to access the Credit Report Details view in Customer Care.
Credit Scoring and Deposits Configuration
Once credit evaluation logic has been set up by IDI per your specifications, you select the specific the logic to drive credit scoring processes via IDI Desktop Client Applications > Credit Scoring and Deposits > Setup > Configuration. Access to this requires Credit Scoring > Setup > Configuration permission.
Note: Most of this setup is applicable for running credit evaluations in the web and IDI Desktop Client; however, the Evaluate when … check boxes only apply for IDI Desktop Client-based evaluations. This functionality is handled through starting block setup for web-based credit evaluations.
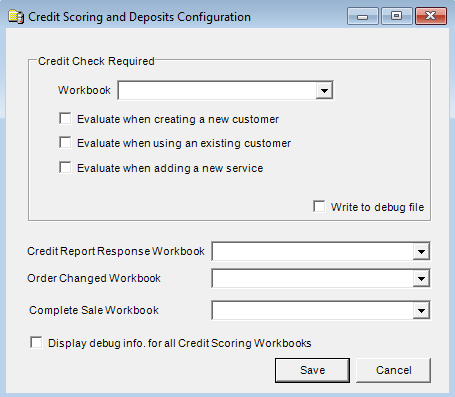
In the Credit Check Required section:
- Use the Workbook menu to select the Credit Check Required logic that determines when a credit check is required as part of the transaction (web or POS Make Sale).
Then use these checkboxes to specify when to run the logic. These check boxes are only applicable for credit checking in POS Make Sale and not the web:
-
- Evaluate when creating a new customer
- Evaluate when using an existing customer – This refers to initiating a new/modify feature transaction on an existing customer.
- Evaluate when adding a new service
- Check Write to debug file to write information to a debug file that can be reviewed to diagnose an issue.
- Use the following respective menus to select the logic for:
- Credit Report Response received from TransUnion.
- Order Changed – item added, modified or removed on a transaction.
- Complete Sale.
Admin Console Data Management Tables
Credit Classes
A customer’s credit class may be used by the credit evaluation logic to determine whether a credit check is required, and/or set credit limits, deposit requirements, and installment plan eligibility. Credit classes are configured in Admin Console Data Management. Accounts are assigned a credit class based on the response returned by TransUnion.
In Admin Console > Data Management expand the Credit Scoring folder and double-click Credit Classes.

| Credit Class ID | System-generated identifier that uniquely identifies the credit class. |
| Description | Credit Class name. |
| Do Not Allow Installment Plan | Displays a True or False value. If True, enhanced installment plan functionality is disabled. If False, this functionality is enabled. |
Credit Report Results
Credit report results are user-defined descriptions that can be associated with report statuses returned from TransUnion.
In Data Management expand the Credit Scoring folder and double-click Credit Report Results.
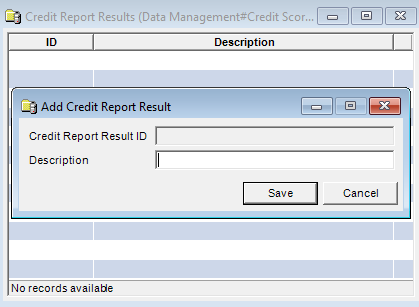
| ID | System-generated identifier that uniquely identifies this record. |
| Description | Credit Report Results name. |
Starting Block Setup for Credit Evaluations in Web Orders
Enabling Starting Blocks
Starting block functionality must be enabled if not already done. There are two settings for enabling starting blocks – one in Orders and one in Customer Care. You must enable the Orders setting to use starting blocks. The setting in Customer Care is also required if you want to use starting blocks for transactions initiated in Customer Care. See the Web Sales knowledge article here for details.
Starting Block Configuration
In the Product Catalog web module, configure at least one starting block to perform credit evaluations. Below describes starting block settings specific to credit scoring.

In the Behavior section, the Perform Credit Evaluation check box directs the transaction to invoke your custom Credit Evaluation logic configured by IDI per your requirements. Note: This behavior also requires Require Register to Start Transaction to be enabled on the Policy tab. This requirement is indicated when you click the associated information (!) icon.
In the Allowable Actions section, the Deposit check box toggles the ability to manually add a deposit to the transaction, independent of the credit evaluation logic. Selecting this option provides an additional Add Deposit action icon in the transaction’s action bar. Notes:
- This setting does not impact automatically adding deposits to a transaction as dictated by your credit evaluation logic.
- With proper setup, manual deposits can also be supported without starting blocks.
Deposits Setup
Admin Console Security Permissions
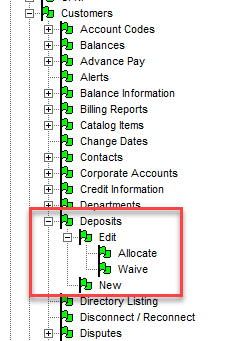
Permissions for deposits are available via Admin Console > Security > Profiles > Permission Profiles > Applications > Customer Management > Customers > Deposits. These govern deposits functionality in IDI Desktop Client.
Web Security Permissions
There are two permissions provided with the Customer Care Admin role and may be added to other roles as needed. These govern deposits functionality in Customer Care and are not applicable for deposits added to a transaction based on credit scoring logic.
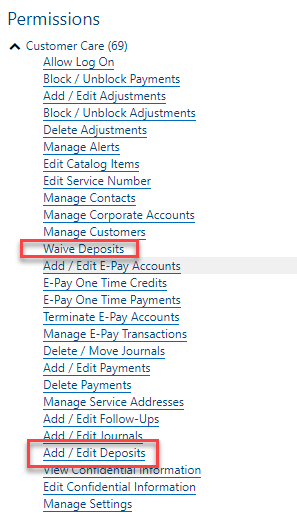
- Waive Deposits – This applies to waiving deposits on a customer’s account.
- Add/Edit Deposits – These apply when managing deposits on a customer’s account.
Admin Console Data Management Tables
There are four tables for deposits in Data Management. These tables apply for managing deposits in Customer Care and IDI Desktop Client.

Allocation Types
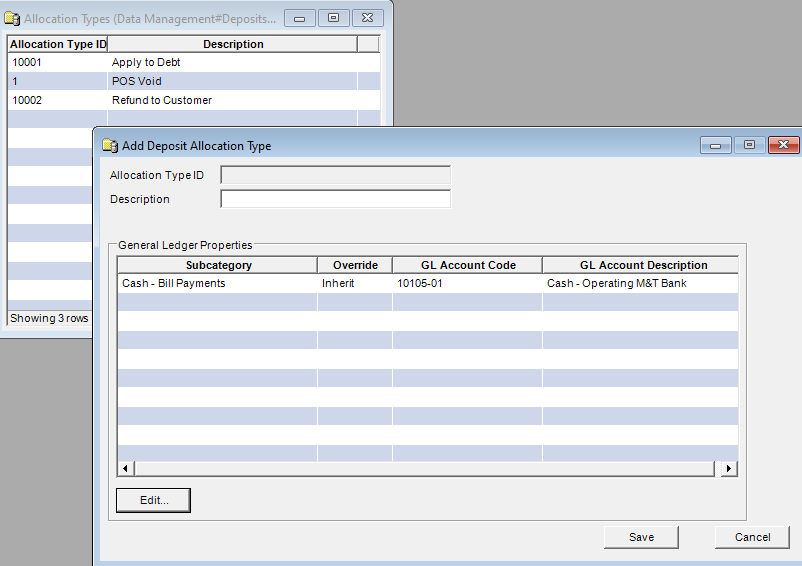
When you allocate a deposit (for return to the customer) you specify a type or reason for the allocation. The content of this table populates the Allocation Type selector in the Allocate Deposit form.
Deposit Types
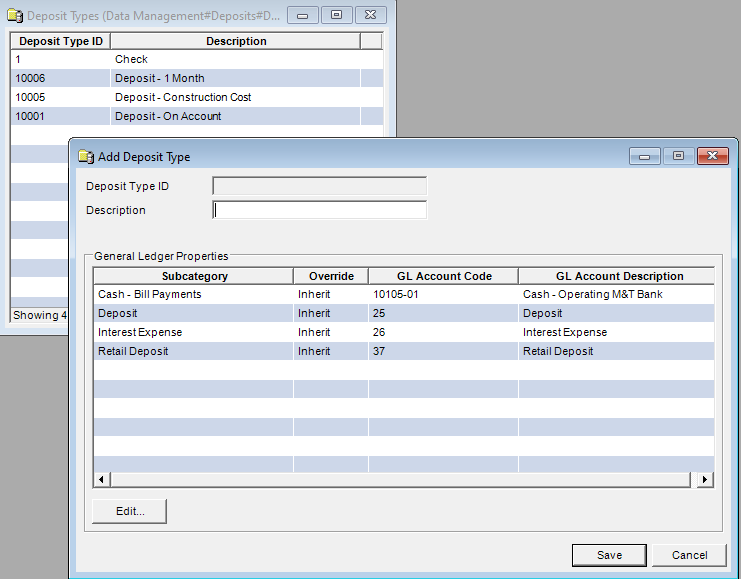
When you add a deposit to a transaction or on an account you specify the type or reason for the deposit. The content of this table populates the Deposit Type selector on the Add Deposit form.
Deposit Waive Types
When you waive a deposit, you specify a waive type or reason for waiving the deposit. The content of this table populates the Waive Type selector on the applicable form.

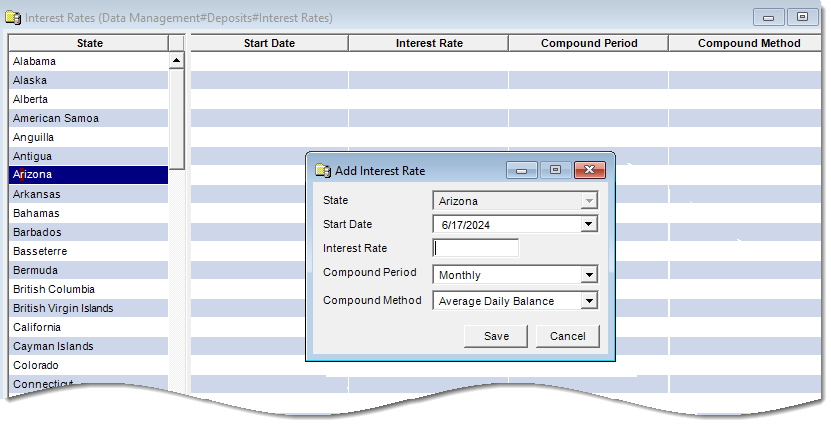
Interest Rates
Deposits may accrue interest, based on prevailing state law. Use this table to specify interest rates for states where you do business as applicable. These rates are used by the scheduled job that calculates and posts interest for deposits.