Before you can communicate with IDI’s Web Services you will need to install two certificate files. These files should be named IDISaaSSecurityToken-NoPrivateKey.p7b and IDISaaSWebServices-Customer.pfx and can be downloaded here. The two files will also install the appropriate certificate chain and yields the following four certificates:
- IDISaaSSecurityToken
- IDISaaSWebServices
- IDIBILL-ISSUING-CA
- IDIBILL-ROOT-CA
More details on the certificates can also be found here.
Installation Instructions
- Download the certificates package available here.
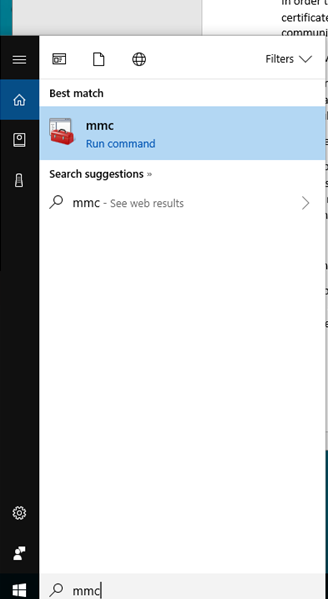
- Open the Windows Start and type MMC to run the Microsoft Management Console.
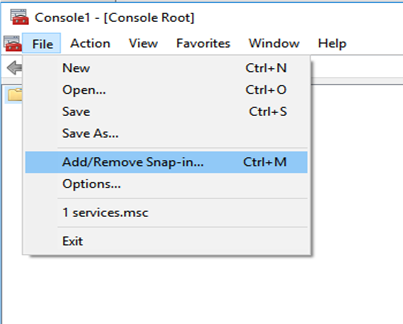
- Select File -> Add/Remove Snap In
- Select Certificates from the Available snap-ins selector and click Add >

- Select Computer Account, then Local Computer and click Finish to add the Snap-In.
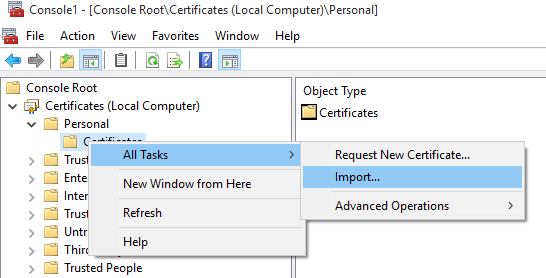
- Expand the Certificates tree item in MMC and right click on Personal -> All Tasks -> Import
- Click Browse to locate the provided certificate file: IDISaaSSecurityToken-NoPrivateKey.p7b, then click Next.
- Click Finish to complete installing the first certificate.
- Once the import completes, right click on Personal -> All Tasks -> Import again and select the file IDISaaSWebServices-Customer.pfx.
- When prompted for a password use the password provided in the README file from the download.
- Complete the rest of the certificate install.
- Once this operation is complete, expand the Personal -> Certificates tree branch and locate the four certificates you added IDISaaSWebServices, IDISaaSSecurity,IDIBILL-ROOT-CA, and IDIBILL-ISSUING-CA) and highlight them and right click -> Copy them to the clipboard.
- Open the Trusted People Branch in certificates and right click on Certificates and select Paste. Select Yes to confirm the install of each certificate.
Troubleshooting Tips
- Make sure the process has appropriate access to the certificates.
- Under Personal->Certificates right-click and choose ‘All Tasks -> Manage Private Keys’
- Ensure user running the hosting process is allowed to Read the certificates
- Under Personal->Certificates right-click and choose ‘All Tasks -> Manage Private Keys’
- IDISaaSSecurityToken and IDISaaSWebServices Certificates should be located in both Personal and Trusted People under the Local Computer account
- The IDIBILL-ISSUING-CA and IDIBILL-ROOT-CA should be in the Trusted People certificate store to validate the certificate revocation list
- If changing certificates, the application should be restarted as previous versions can be cached.
- If hosting in IIS, IIS should be restarted completely, not just recycle an application pool.
- The following errors may be discovered during new application set-up if the certificates are not in the required locations (Personal and Trusted People):
- Cannot find a unique certificate that matches the criteria
- Cannot validate certificate trust chain
- The key needed to decrypt the encrypted security token could not be resolved
- There is a common issue when looking up the certificate by thumbprint where copying the thumbprint from the Windows UI has extra invisible characters to the front. If you cannot find the certificate by thumbprint, make sure you do not have any extra characters. Copying into and out of Notepad will help.