When an E911-enabled service is included in an order, a Service Address (with E911 information) is associated to the service. On submitting the order, a record with E911 information for the service is added to an E911 batch for a specific E911 Provider and E911 Company. On a regular basis your company must send files with up-to-date E911 information to the applicable E911 Providers.
This can be done manually or by scheduled job. The scheduled job queries all batches for the E911 provider where the Sent Date is null or is greater than or equal to the current date plus one month at 12:00:00 AM. Then it updates the E911 batch detail status to Unsent for each record in each batch returned from the query. Lastly, it creates an E911 batch export file for each batch. There will be one file generated for each batch. This export will return the same file that would have been generated had the user gone through the E911 File Generation Wizard manually through the IDI platform GUI.
If you require manual approval of batch records, this can be done as part of the file generation process when you use the E911 File Generation wizard or when managing services addresses in Customer Care. Records are added to the batch with a status of Not Ready. This means the record has not been approved and will not be sent. These records must be marked as approved by having their status changed to Unsent. This can be done with one command for an entire batch or for individually selected records within a batch.
In either case, the export file is placed on the main server in the eFrameNet / Environments / environmentName / environmentName_BackgroundProcesses / E911 Export folder. There is a subdirectory for each E911 Provider. Carriers are responsible for setting up a file transfer request to transmit these files to the E911 provider. Records in a batch that remain in Not Ready status can be approved and sent at a later time. Only approved batch records get added to the export file and ultimately get sent to the applicable E911 provider.
Using the E911 File Generation Wizard
Note: E911 File generation requires the E911 Batch Export permission.
The E911 File Generation wizard is not a wizard in the traditional sense in that you do not necessarily advance through each page and click Finish to produce a result. Rather, you can use the wizard in several different ways:
- Generate an E911 export file for a selected E911 Provider. This may also require you to approve batch records if your system is not set up to auto-approve on MSAG validation.
- Manage individual batch records, for example resubmit an already sent record.
To enter the wizard, from the Applications menu select BackOffice Management > E911 > E911 File Generation. This displays the E911 Provider Selection page listing the E911 Provider IDs you added to your system and their descriptions.
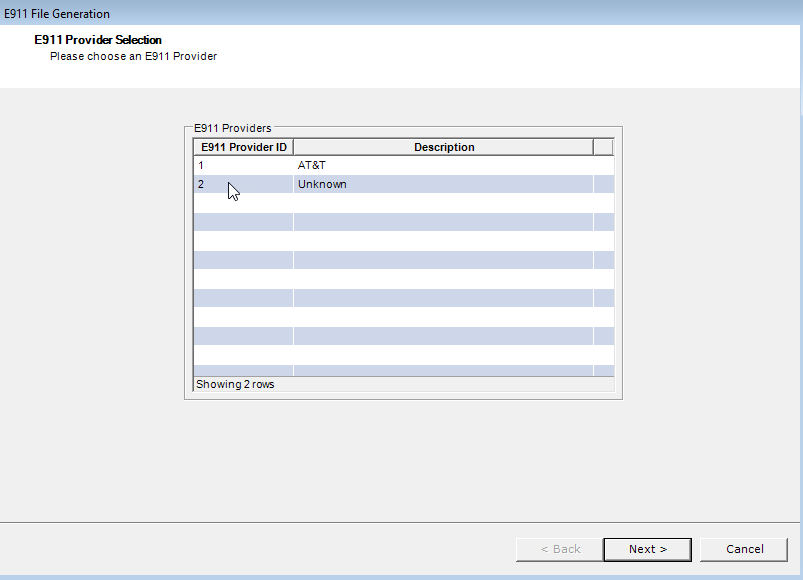
Select the E911 Provider you wish to work with and click Next. This displays the E911 Batch Selection page. The system checks the E911 Batch table for records with the given company/provider combination, identifies the E911 Company and the highest BatchFileSequenceID. The file naming convention is E911 Company, sequence number.dat. The sequence numbering will be unique sequences for each unique combination of E911 Provider and E911 Company that exists.
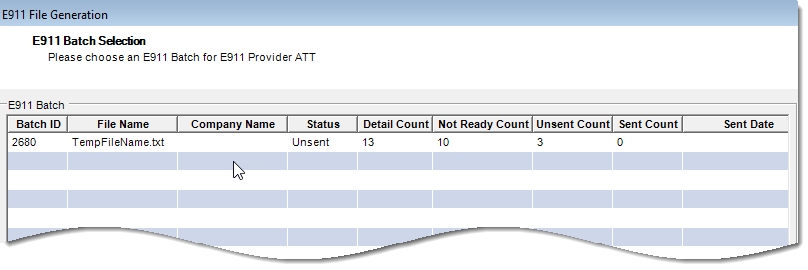
Select a batch, right-click and choose Create E911 Export File, then click Next.
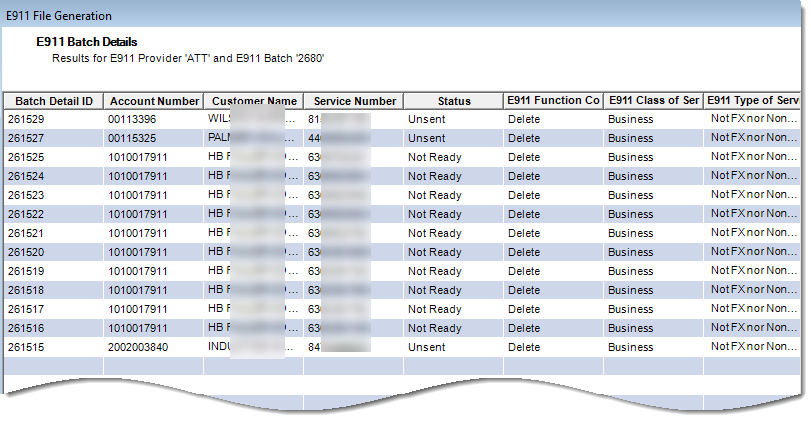
This displays the batch details for you to review then click Finish when you’re ready to generate the file.

E911 Batch Search
The E911 Batch Search lets you find E911 Batch information based on the E911 Provider and the E911 Batch Status. To perform an E911 batch search, from the BackOffice Management menu choose E911 > E911 Batch Search. This displays the E911 Batch Search form.
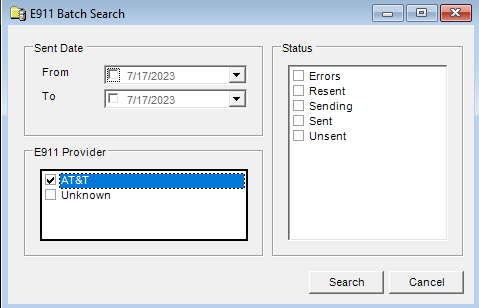
Enter search criteria and click Search. This displays E911 Batch Search Results. From the search results you can view a selected batch detail or refresh the search results.

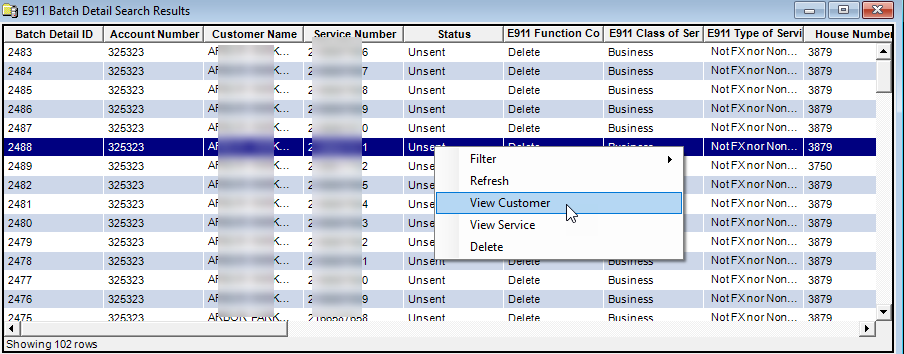
Choosing to view an E911 Batch Detail displays the details for the selected batch. From here, for a selected detail you can view the customer, view the service, or delete the detail.
E911 Batch Detail Search
The E911 Batch Detail Search lets you find E911 information about each individual service number. To perform a Batch Detail Search, from the BackOffice Management menu choose E911 > E911 Batch Detail Search. This displays the E911 Batch Detail Search form.

Enter search criteria and click Search. This displays the E911 Batch Detail Search Results.

- If the E911 Batch Detail record you select has not yet been included in an E911 file, the E911 Batch Detail Search Results shortcut menu lets you view the customer, view the service or refresh.
- If the E911 Batch Detail record you select has been included in an E911 file, the E911 Batch Detail Search Results shortcut menu contains the following options:
| Resubmit | Adds the previously sent E911 Batch Detail record to the most recent E911 Batch that has not been generated. |
| Resubmit With Function Code As | Adds the previously sent E911 Batch Detail record to the most recent E911 Batch that has not been generated with the Function Code you select.
Insert: Adds the E911 Batch Detail record as a new service number/service address combination. Change: Makes a change to an existing service number/service address combination. Delete: Removes the service number/service address combination from the ALI database. Unlock: Releases the service number for another carrier to maintain. Used when the service number is being ported out. Migrate: Accepts the responsibility to maintain the service number belonging to a different carrier. Used when the service number is being ported in. |
| Resubmit All Records | Adds the E911 Batch Detail records currently on the data table to the most recent E911 Batch that has not been generated. You may limit the records by using the Filter functions. |
| View Customer | Opens the customer account record on the Summary tab. |
| View Service | Opens the customer account record on the Catalog Items tab with the service number highlighted. |
| Refresh | Updates the E911 Batch Detail Status. |
Generate all Files
You can choose to create all the E911 Files for the various E911 Providers at the same time. Note: This does not provide an opportunity to approve batch details, so they must already have been approved via the wizard (if not automatically approved).
- From the Applications menu, select BackOffice Management > E911 > Generate All E911 Files.
- Click Yes on the confirmation window.
The message closes and files for each of the E911 Providers are created moved to the E911 Export folder on the server.