In Customer Care and IDI Desktop Client you can monitor and manage assigned discounts. You can:
- monitor units consumed and available units remaining for discounts on an account via any view that shows usage balance.
- edit certain discount wizard options by editing the discount configuration in the Product Catalog.
- edit Number of Units directly on a customer’s account.
- monitor and manage reward points when applicable.
- specify the services to share in a Grant discount.
Monitoring Discount Activity
Discount consumption is broken out by discount category. Usage is only available for viewing AFTER usage has been processed. For example, if a user goes into Product Management, creates new discount categories and applies discounts to those, they won’t see the effect until usage is processed.
Note: This applies for both discounts assigned at the customer account level AND the service level.
Below is an account’s Usage Balance view in Customer Care.

In IDI Desktop Client there are three ways to access this information:
- Account Summary Last Invoice Information section Usage/Free Units link.

- From an open invoice
- From the Customer window, Services tab by right-clicking on a service and choosing Properties > Unit Balance.
Editing Discount Wizard Options on an Account
The Configure menu option on a discount in the Product Catalog changes to Edit Configuration after the discount has been assigned to one or more accounts. In this case, certain discount wizard options can be changed and will apply to all assigned instances of the discount on saving the changes.
To edit the configuration for an assigned discount:
- Find the discount in the Product Catalog.
- Right-click on the item and choose Edit Configuration. Note: This option is only available for discounts that have been assigned to one or more accounts.

The options that can be edited depend on the type of discount.
Grant Discounts
- Can be edited:
- Number of Units – This is done directly on the accounts as described in Editing Number of Units After Discount is Assigned/Billed.
- Proportional Allocation
- Selected Usage Type
- Selected Distance Type
- Selected Wireless Indicators
- Selected Originating Locations
- Selected Terminating Locations
- Selected Serving Locations
- Time of Day
- Cannot be edited:
- Sharing options
- Units options (with the exception of Number of Units)
- Recurrence Type
- Grant Expiration
Volume Discounts
- Can be edited:
- Contributing/eligible usage types
- Contributing/eligible service types
- Contributing/eligible distance types
- Contributing/eligible originating locations
- Contributing/eligible terminating locations
- Time of Day
- Ignore calls with zero charges
- Contributing/eligible products
- Reward point expiration
- Cannot be edited
- Discount Type
- Loyalty
- Tier Units
- Amount Type
Editing Number of Units after Discount is Assigned/Billed
Authorized users (through permission profile) can modify the Number of Units field for an assigned/billed grant discount directly on a customer’s account. This lets you analyze actual usage on accounts and then adjust the discount to better fit your needs. The path to the permission in Admin Console Permission Profiles is: Application > CostGuard Client > Product Management > Discount Configuration > Number of Units > Edit. To edit Number of Units, drill down to the discount on the Services tab in the Customer window, then right-click and choose Edit.

Reward Points
In IDI Desktop Client Customer Management you can monitor and manage Reward Points via the Customer window > Balances tab> Reward Points view. You can tender purchases for a customer when they have points available by selecting the Reward Cash tender type (available via the Other tab on the tendering form.
Viewing and Managing Reward Points Balance
Whenever points are added to or subtracted from an account, the account posting process updates the balance by settling debit points (points that have expired) against credit points (points added by the billing operation).
Basic Business Rules:
- Debit points settle against the points that are closest to expiration first, then against the points next closest to expiration, and so on.
- Unposted reward points are not available for use by the tendering operation.
- All transactions (manual adjustments, tendering debits, expiration debits) immediately post to the account EXCEPT reward points that are added by the billing operation. Reward points created by the monthly bill operation do not post until the bill period has been approved. This lets you review the invoices and their associated reward points, make changes if necessary, and then rebill, without being concerned that the reward points may have already been used by a customer between the initial bill and a rebill.
The Reward Points view, selectable via the left drop-down menu on the Balances tab, displays a list of reward point transactions. The upper pane lists posted transactions. The lower pane lists unposted transactions.

Note: You can also view Reward Point balances in Customer Care via the Balances page on a customer account; however, currently Customer Care does not support tendering as described below.
Managing Reward Points
With the appropriate permissions, you can make adjustments (debit or credit) to the existing Reward Points balance via the Actions drop-down menu.
Tendering Reward Points
Your subscribers can use reward points as tender for a POS purchase or to tender a bill payment at a POS location. To use reward points as tender, a Reward Cash tender type must be one of the store’s accepted Tender Types set up in Register Policies.
When tendering a POS transaction, select the Reward Cash tender type. This opens the Reward Cash Details form displaying the available Reward Points and the converted value based on the Conversion Factor set up in the Product Catalog.
Configuring Shared Services for Grant Discounts
On Grant discounts, when the Shared Across Services option is set to Shared across selected services (max lines or no max) the Shared Services list must be configured on an account basis. When a shared selected services discount is sold, a dialog for selecting the services is displayed at the time of sale unless you suppress this dialog by checking the Suppress Shared Grant Discount Dialog setting in POS Backoffice > Locations > General Options tab.

The default is to display (not suppress) the dialog. In this case, at the end of the retail sales transaction in POS after you tender the sale and confirm the receipt information, you’ll get a prompt to enter the shared services.

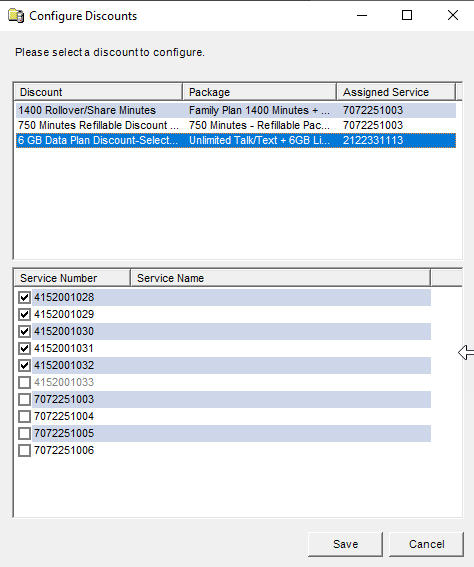
Clicking Yes displays the following dialog for entering the list of shared services. Note: The dialog will show all discounts on the sale. Select the applicable discount to see the list of services eligible for sharing the discount.
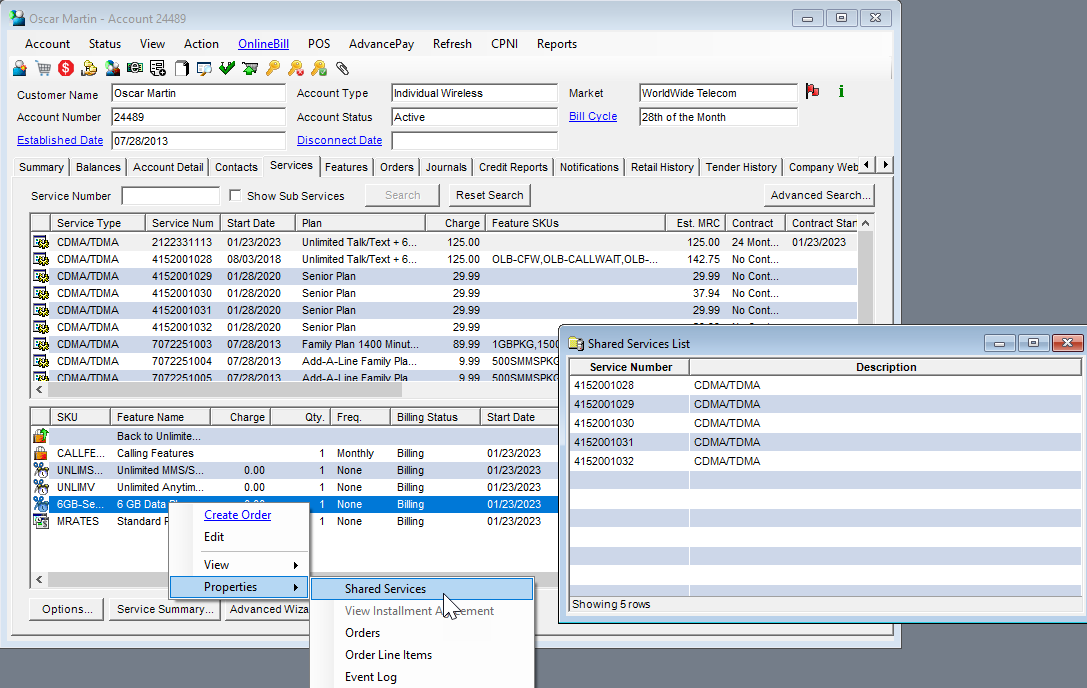
If the location for the sale is set up to suppress the dialog or the dialog is dismissed without selecting the services, a follow-up message is generated as a reminder to populate the shared numbers list. In that case, the list is configured on the service via the discount context menu (right click and choose Properties > Shared Services).